Creating a User Role
To establish distinct access privileges and responsibilities for different users, you can create customized user roles within the Zango platform. Follow these simple steps to create a new user role:
Access the User Role Menu in the App Panel: Navigate to the App Panel interface and locate the "User Role" menu. This is where you'll initiate the user role creation process.
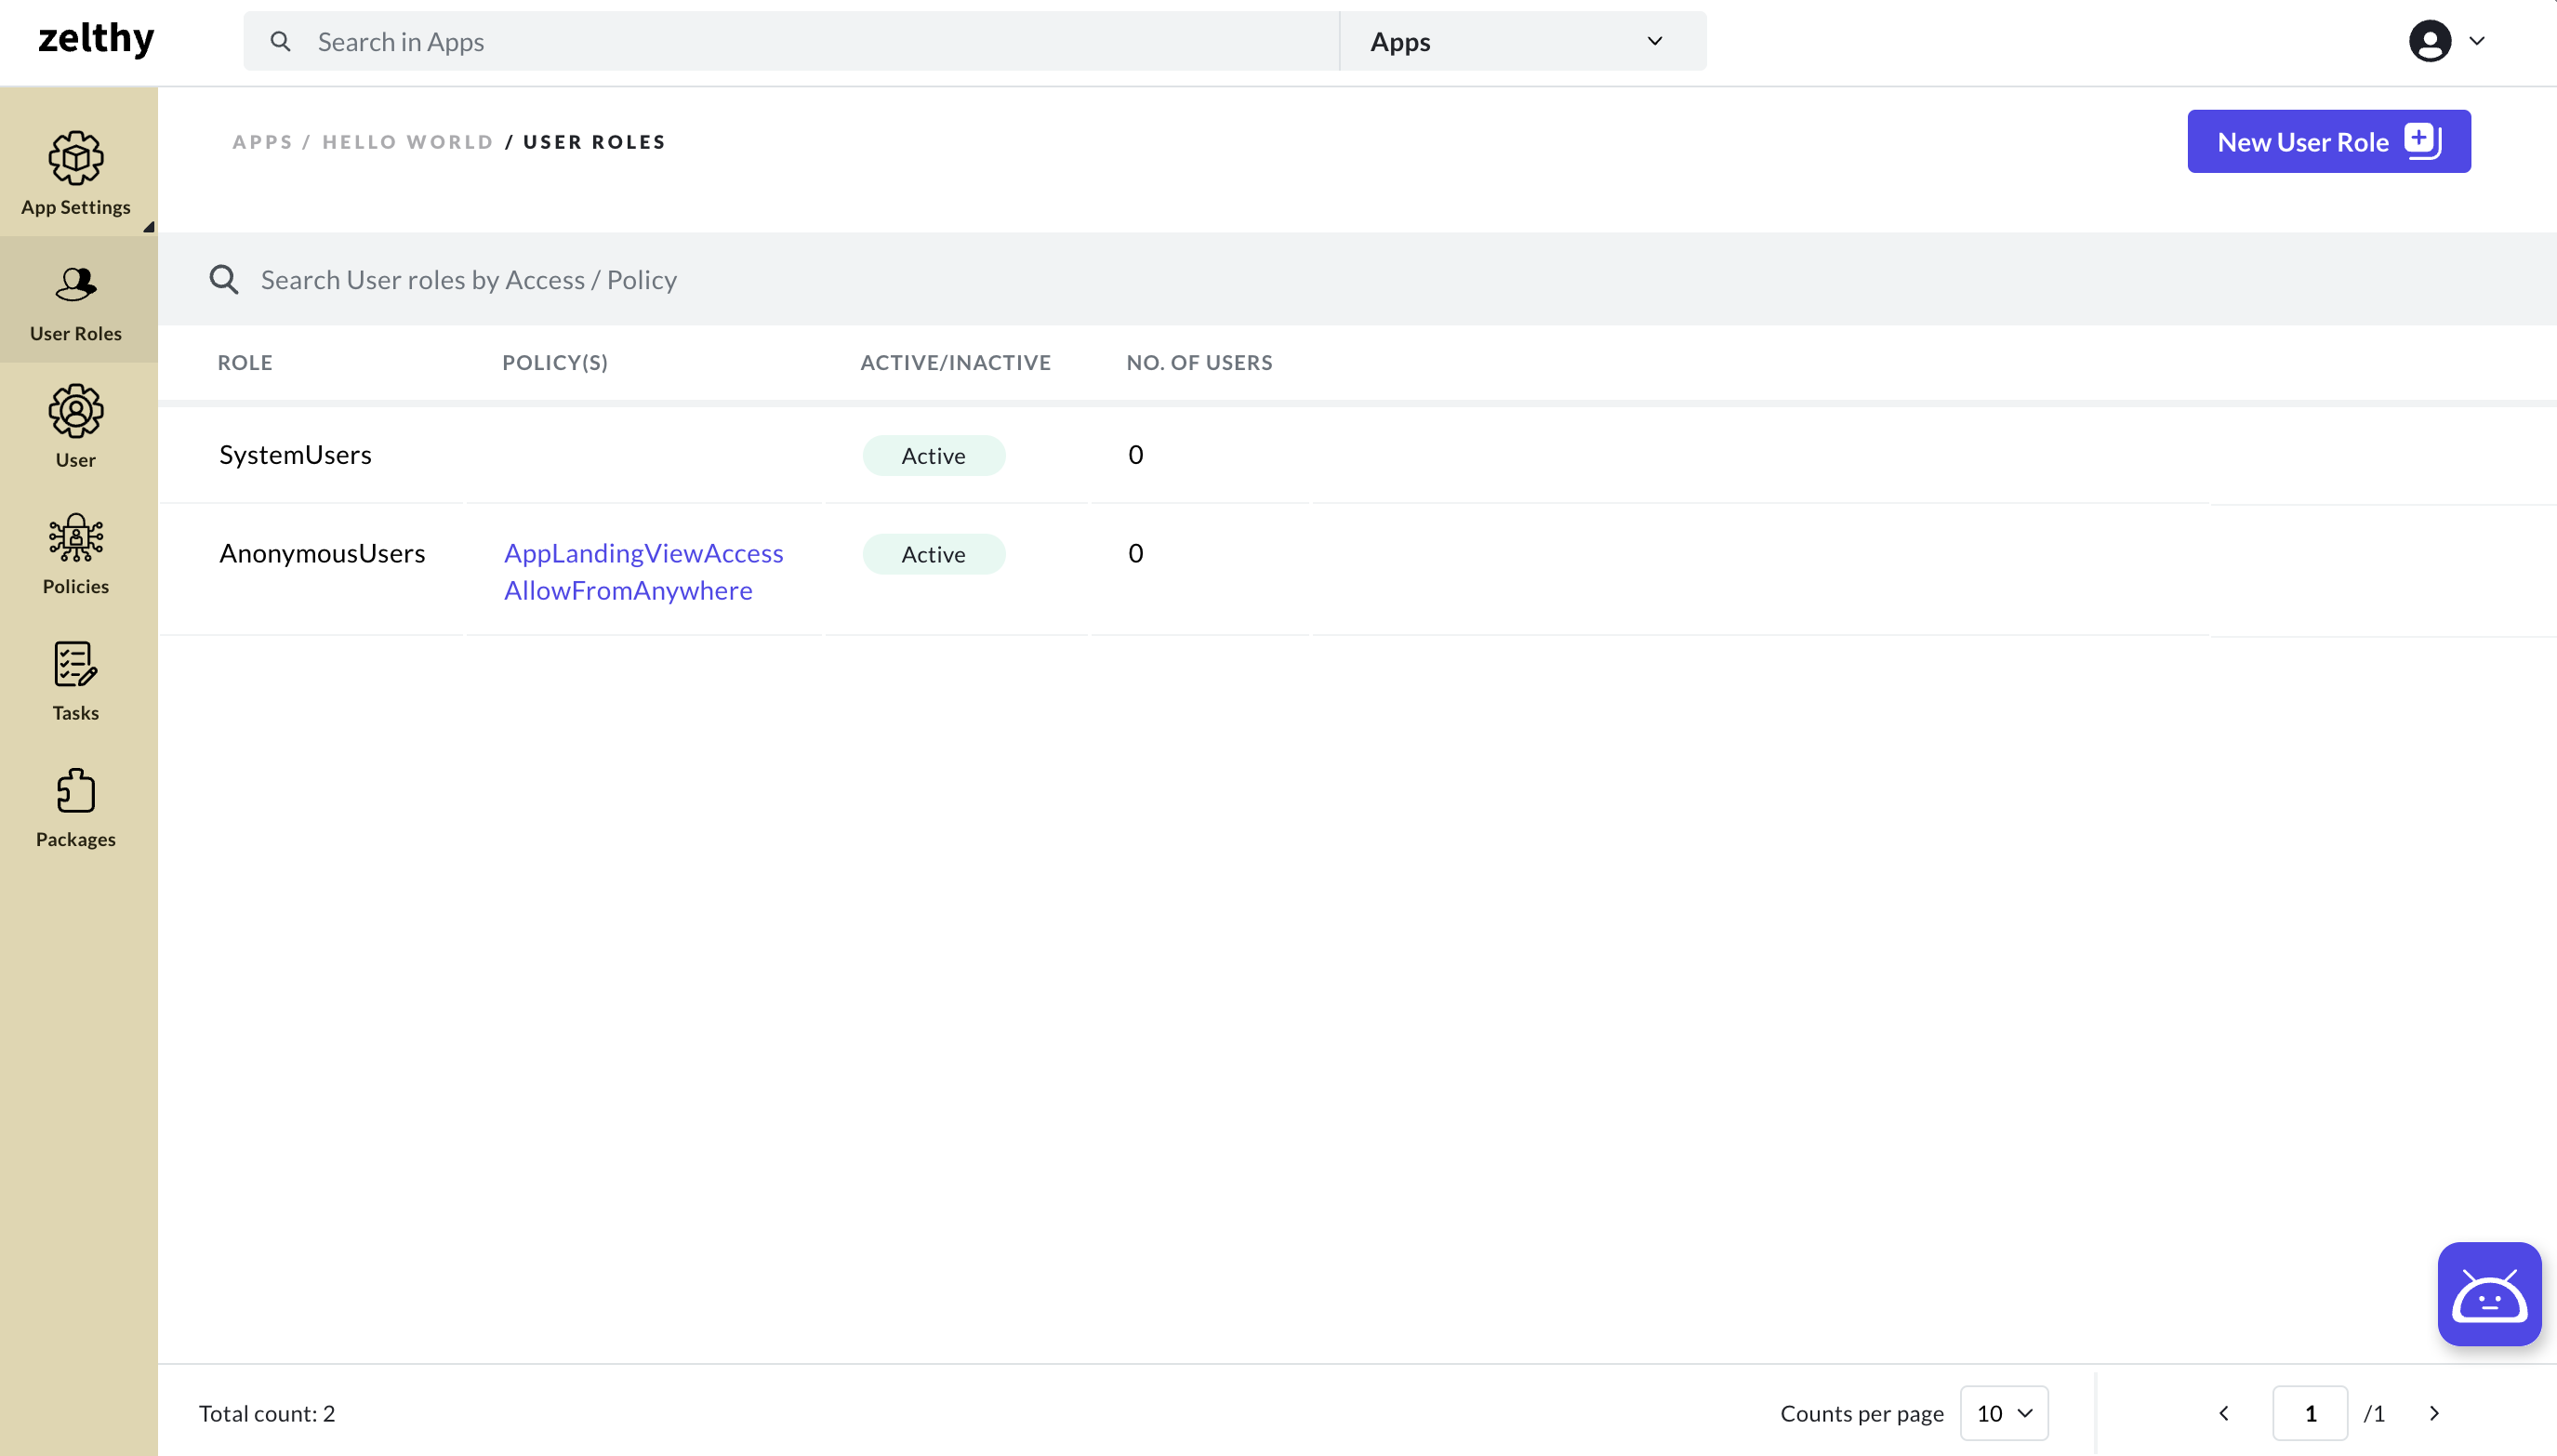
Click on the New User Role Button: Within the User Role page, look for the "New User Role" button and click on it. This action will initiate the process of defining a new user role.
Provide User Role Details: A form will appear, prompting you to fill in the details for the new user role. Focus on filling in the user role name, which serves as an identifier for this role.
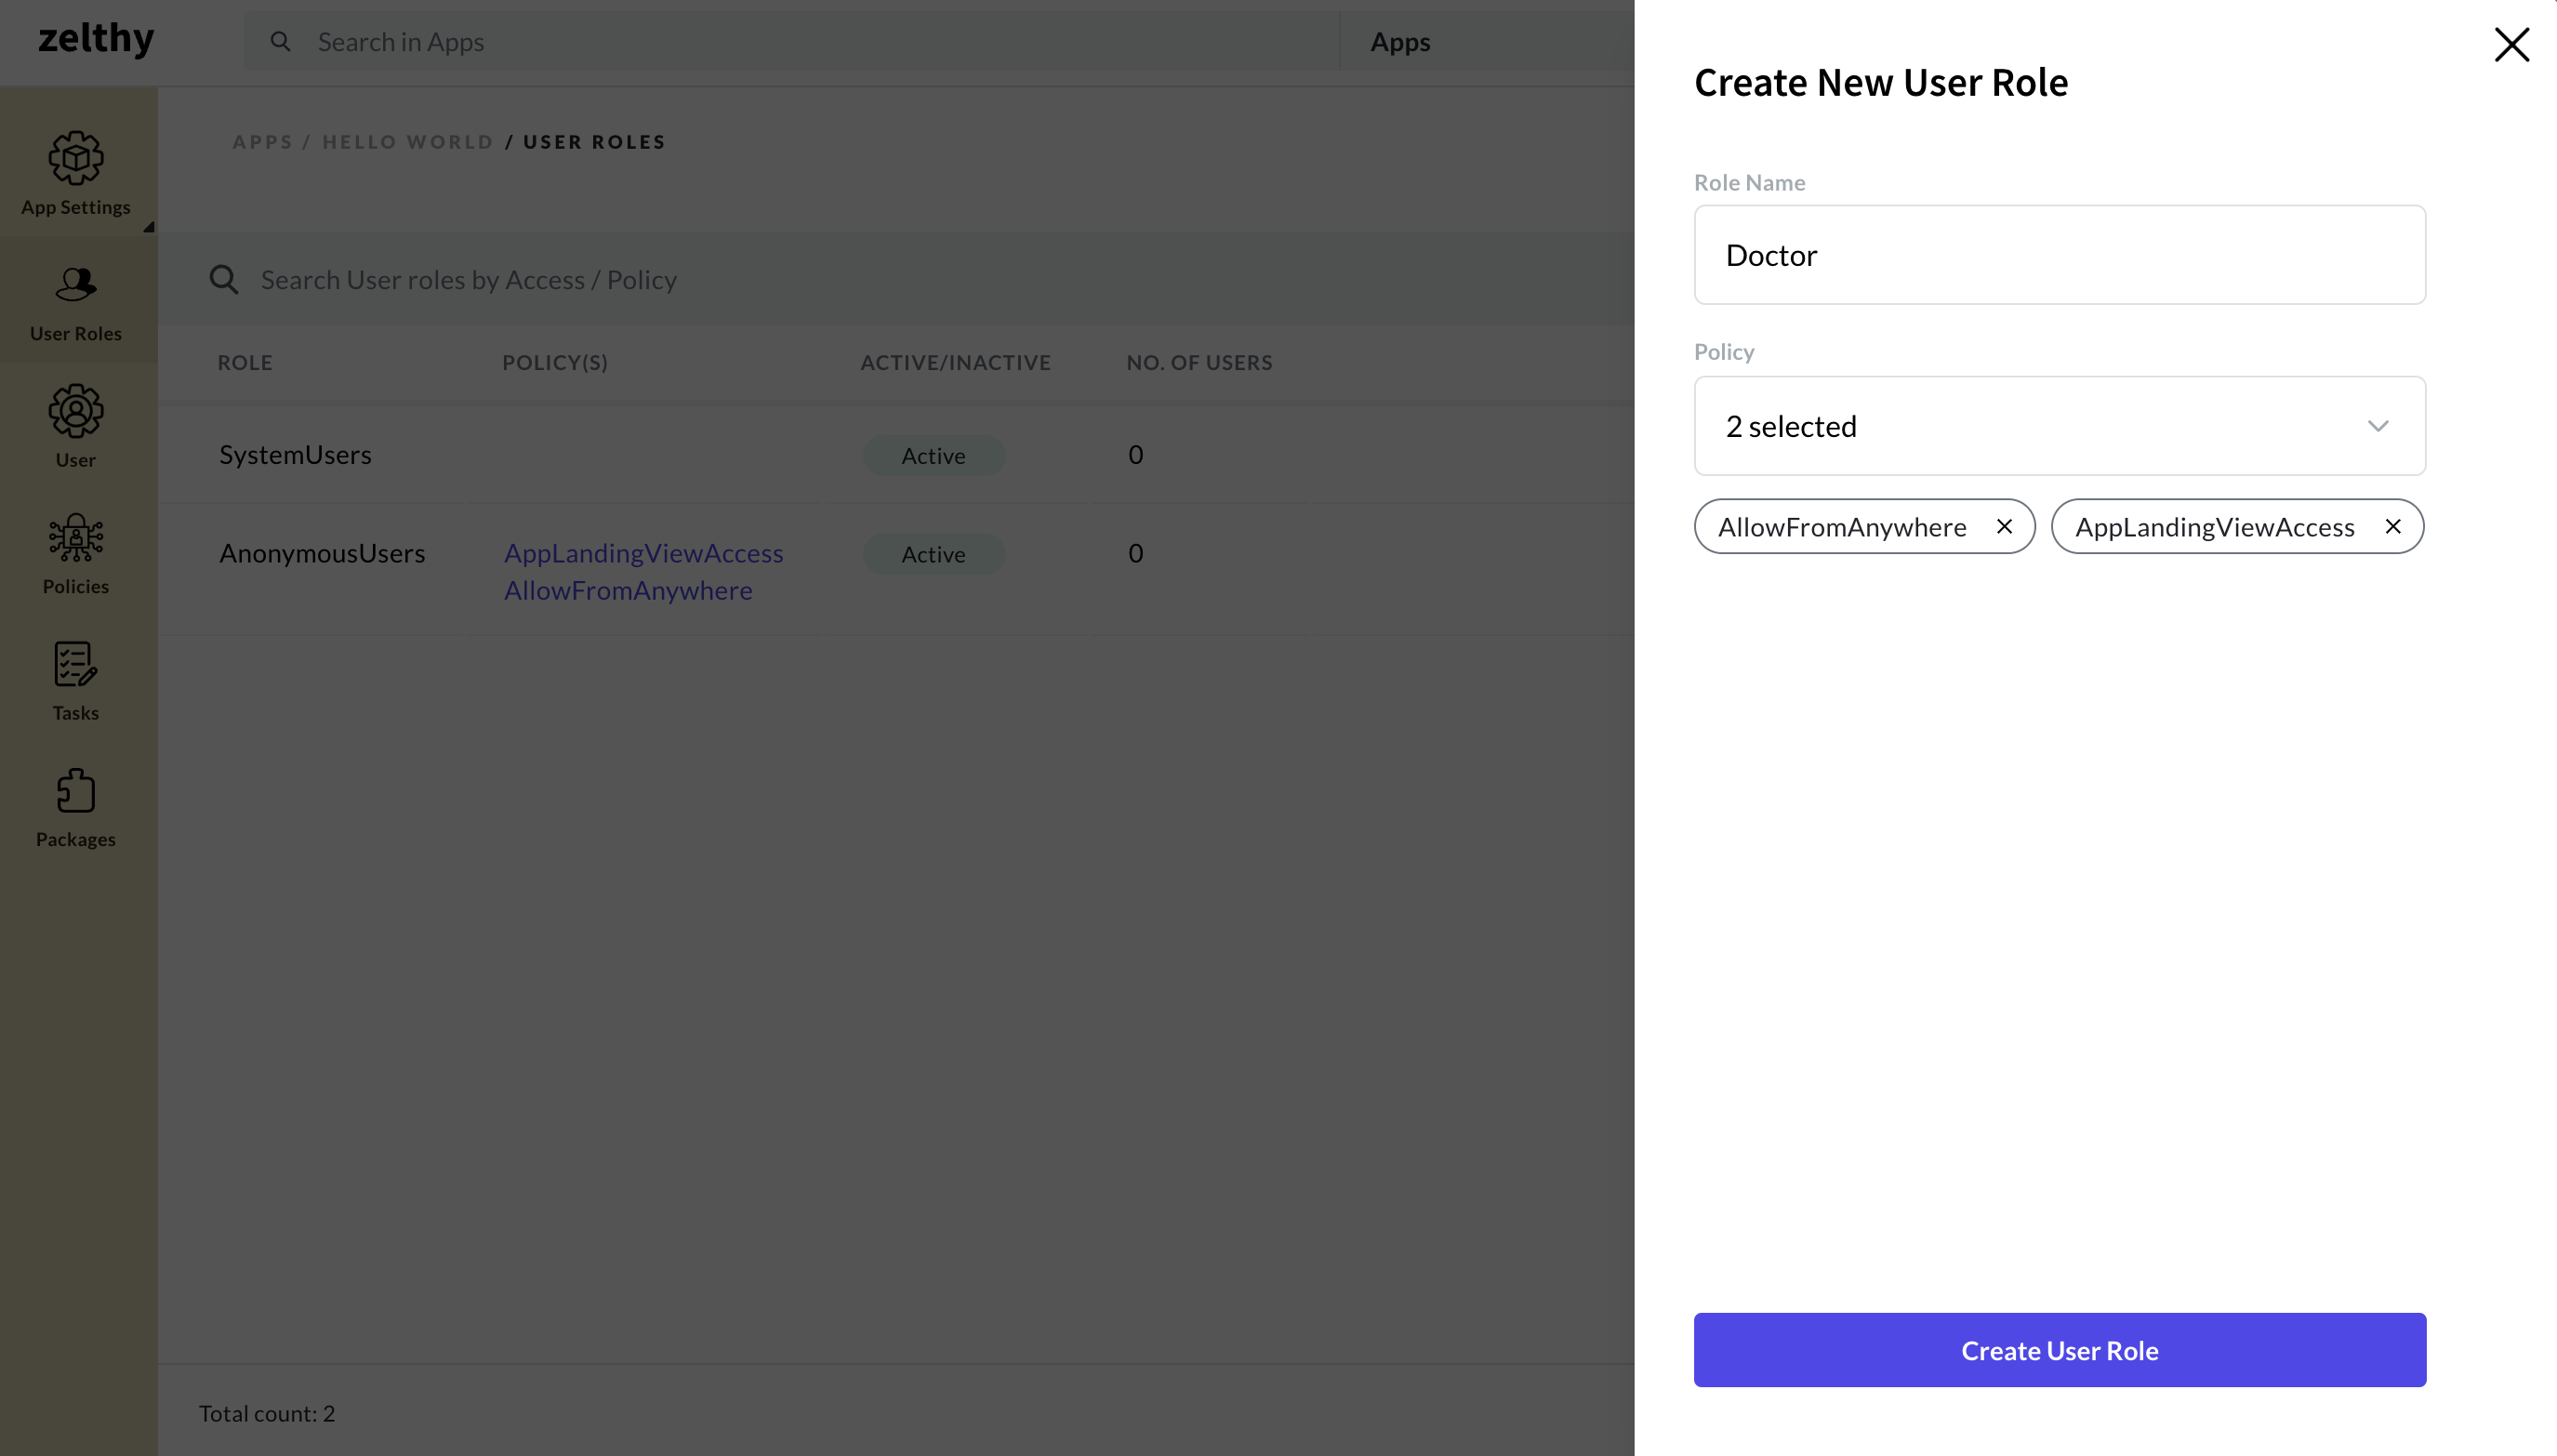
Click the Create Button: After entering the required information, click the "Create" button. This step finalizes the user role creation process.
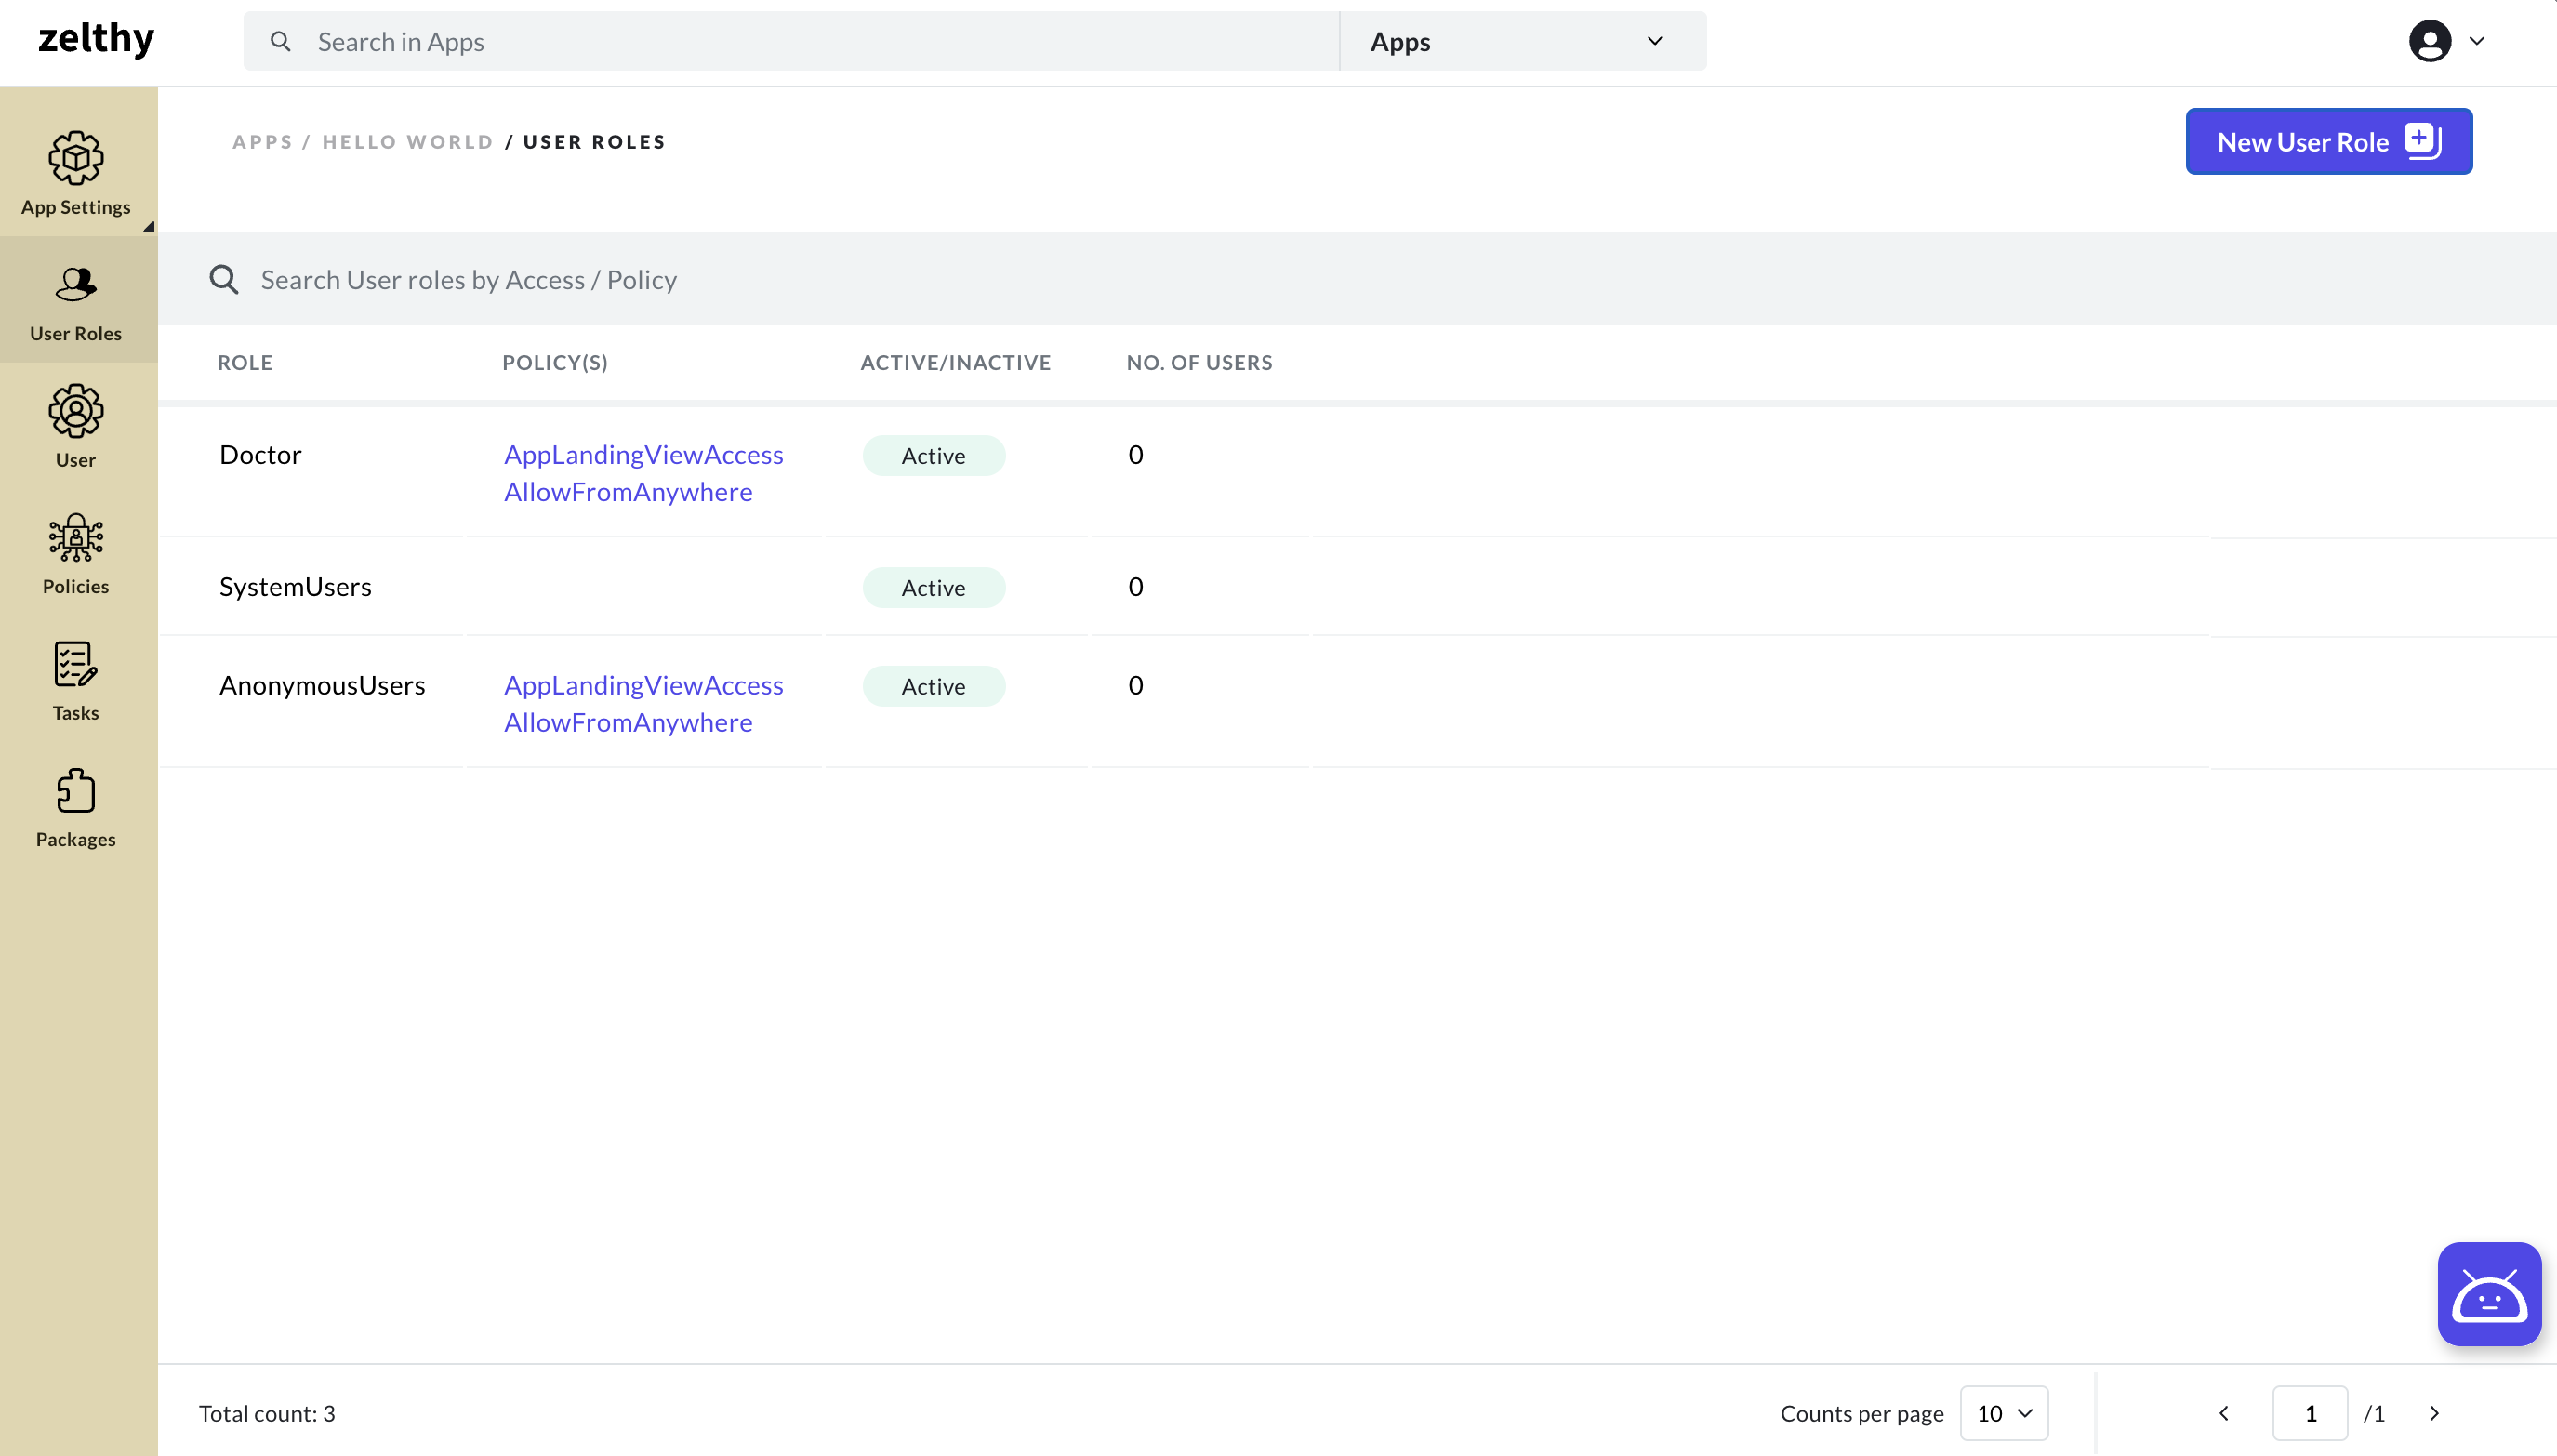
Once these steps are completed, a new user role will be successfully created. You will be able to observe a new row in the User Roles table, displaying the details you entered during the creation process. This user role is now ready to be configured.