Hello world
"Hello, World!" is a tradition in programming and software development. It's often the first program written when learning a new programming language, framework, or tool. Its purpose is simple: to introduce the basic structure, syntax, and workflow while providing a tangible result—a friendly greeting displayed on the screen.
In this guide, we'll walk you through creating a basic "Hello, World!" app. Whether you're new to coding or exploring a new framework, this tutorial will help you set up your environment, write your first lines of code, and understand the essential steps of the development process.
Accessing the App Panel
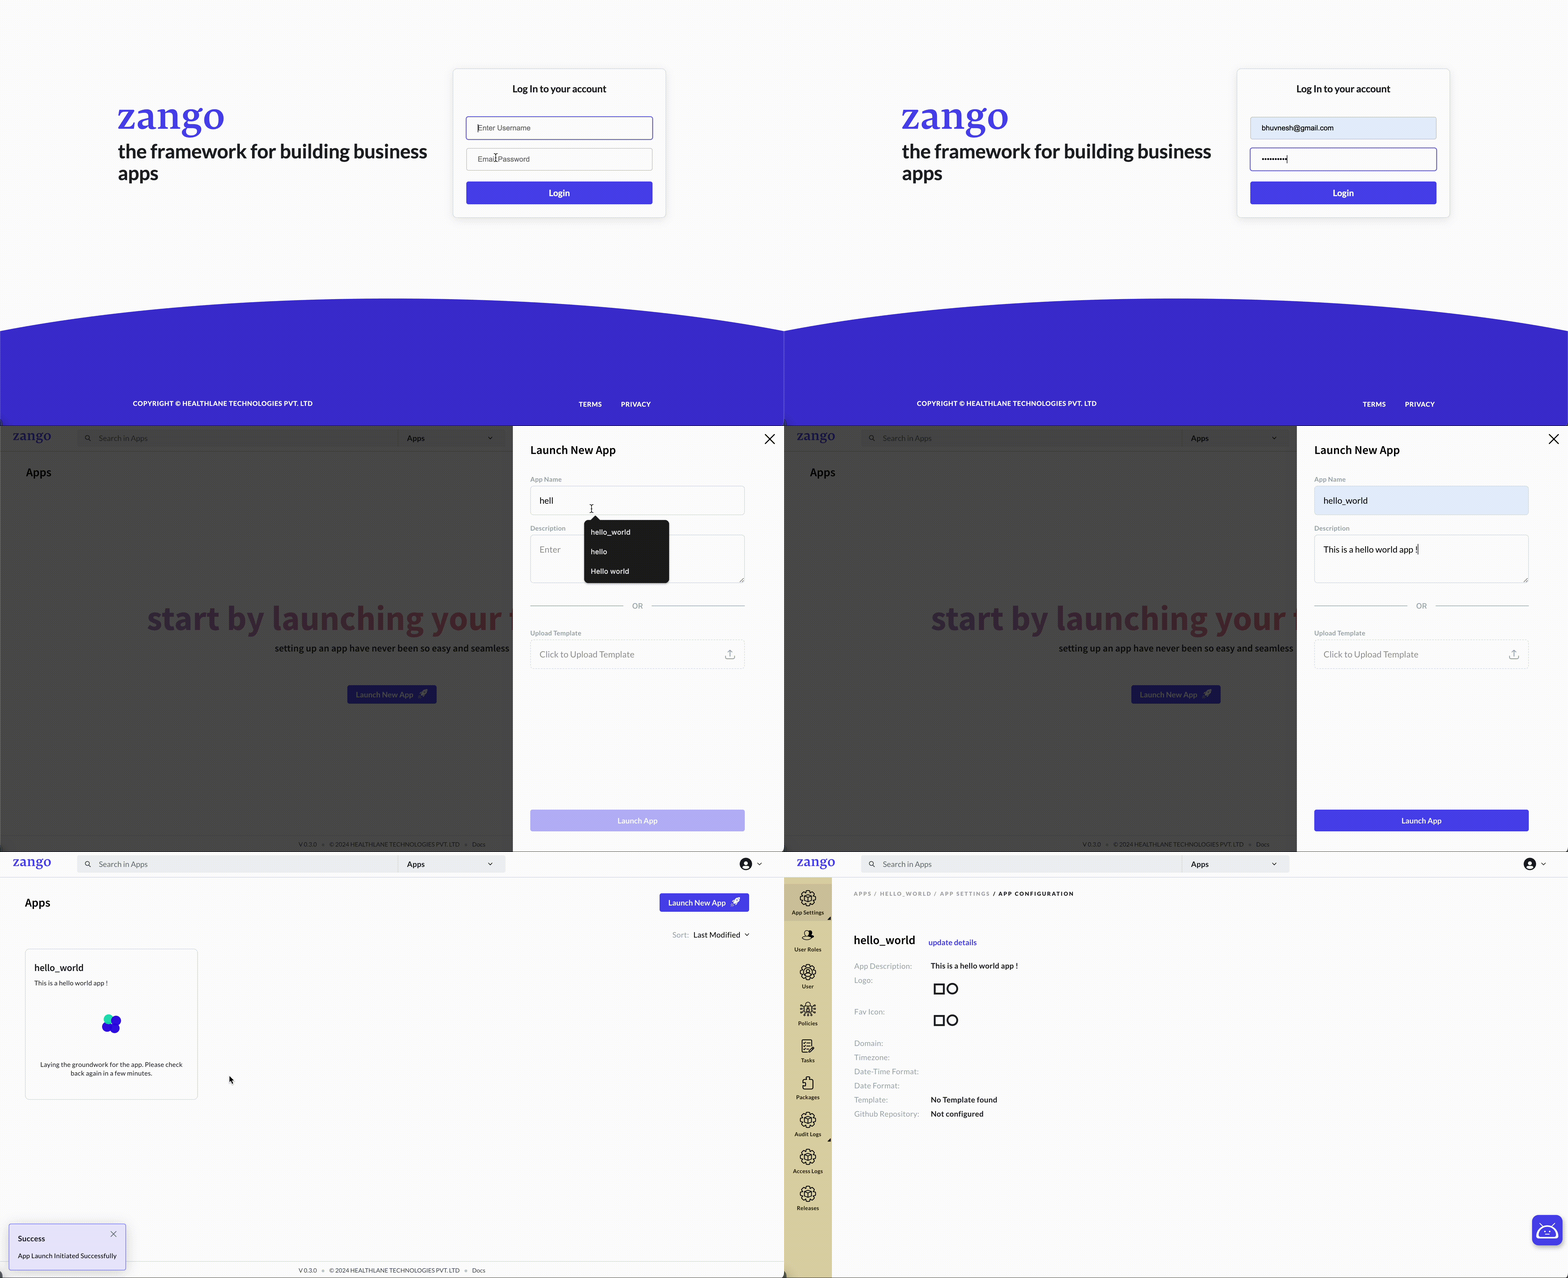
To start creating apps on the Zango platform, you'll need to access App Panel, which is the control center for managing Apps on the Zango Platform. Follow these steps to access the App Panel:
Assuming you have completed the installation and project setup process either using virtual environment or through Docker, open any browser on the local machine and navigate to
URL http://localhost:8000/platform and login through your platform credentials.
Creating the hello_world app
Now let's create our first hello world app. When you click on the Launch app button, a sidebar will appear as show below, add app name, app description and click on launch app button:

After your app is launched, don't forget to configure a domain for it.
The coding part
Creating a module
Lets create a module called hello for our hello world app. Also add the views.py and urls.py files inside it. Its just a basic hello world app, so we won't be adding any models.
root                                # root where this readme file is located.
|
+-- MyFirstProject                  # main MyFirstProject folder which contains everything related to our project.
|   |
|   +-- workspaces                  # all the apps are create dynamically inside this folder.
    |   |
    |   +-- hello_world             # hello world directory, detailed app structure is present inside the app directory.
        |   |
        |   +-- hello               # newly created todo module
            |   +-- views.py        # contains the views related to hello module
            |   +-- urls.py         # contains the urls related to hello module
                +-- forms.py        # contains the forms related to hello module
Creating a basic view
Lets create a very basic API view inside views.py of hello module that returns "Hello, World!" in response.
MyFirstProject/workspaces/hello_world/hello/views.py
from rest_framework.views import APIView
from rest_framework.response import Response
from rest_framework import status

class HelloWorldView(APIView):
    def get(self, request, *args, **kwargs):
        return Response({"message": "Hello, World!"}, status=status.HTTP_200_OK)
Setting up urls.py
Now, we'll add the urls in urls.py for out HelloWorldView view inside hello module.
MyFirstProject/workspaces/hello_world/hello/urls.py
from django.urls import path
from .views import HelloWorldView

urlpatterns = [
    path('world/', HelloWorldView.as_view(), name='hello_world_api'),
]
Setting up policies
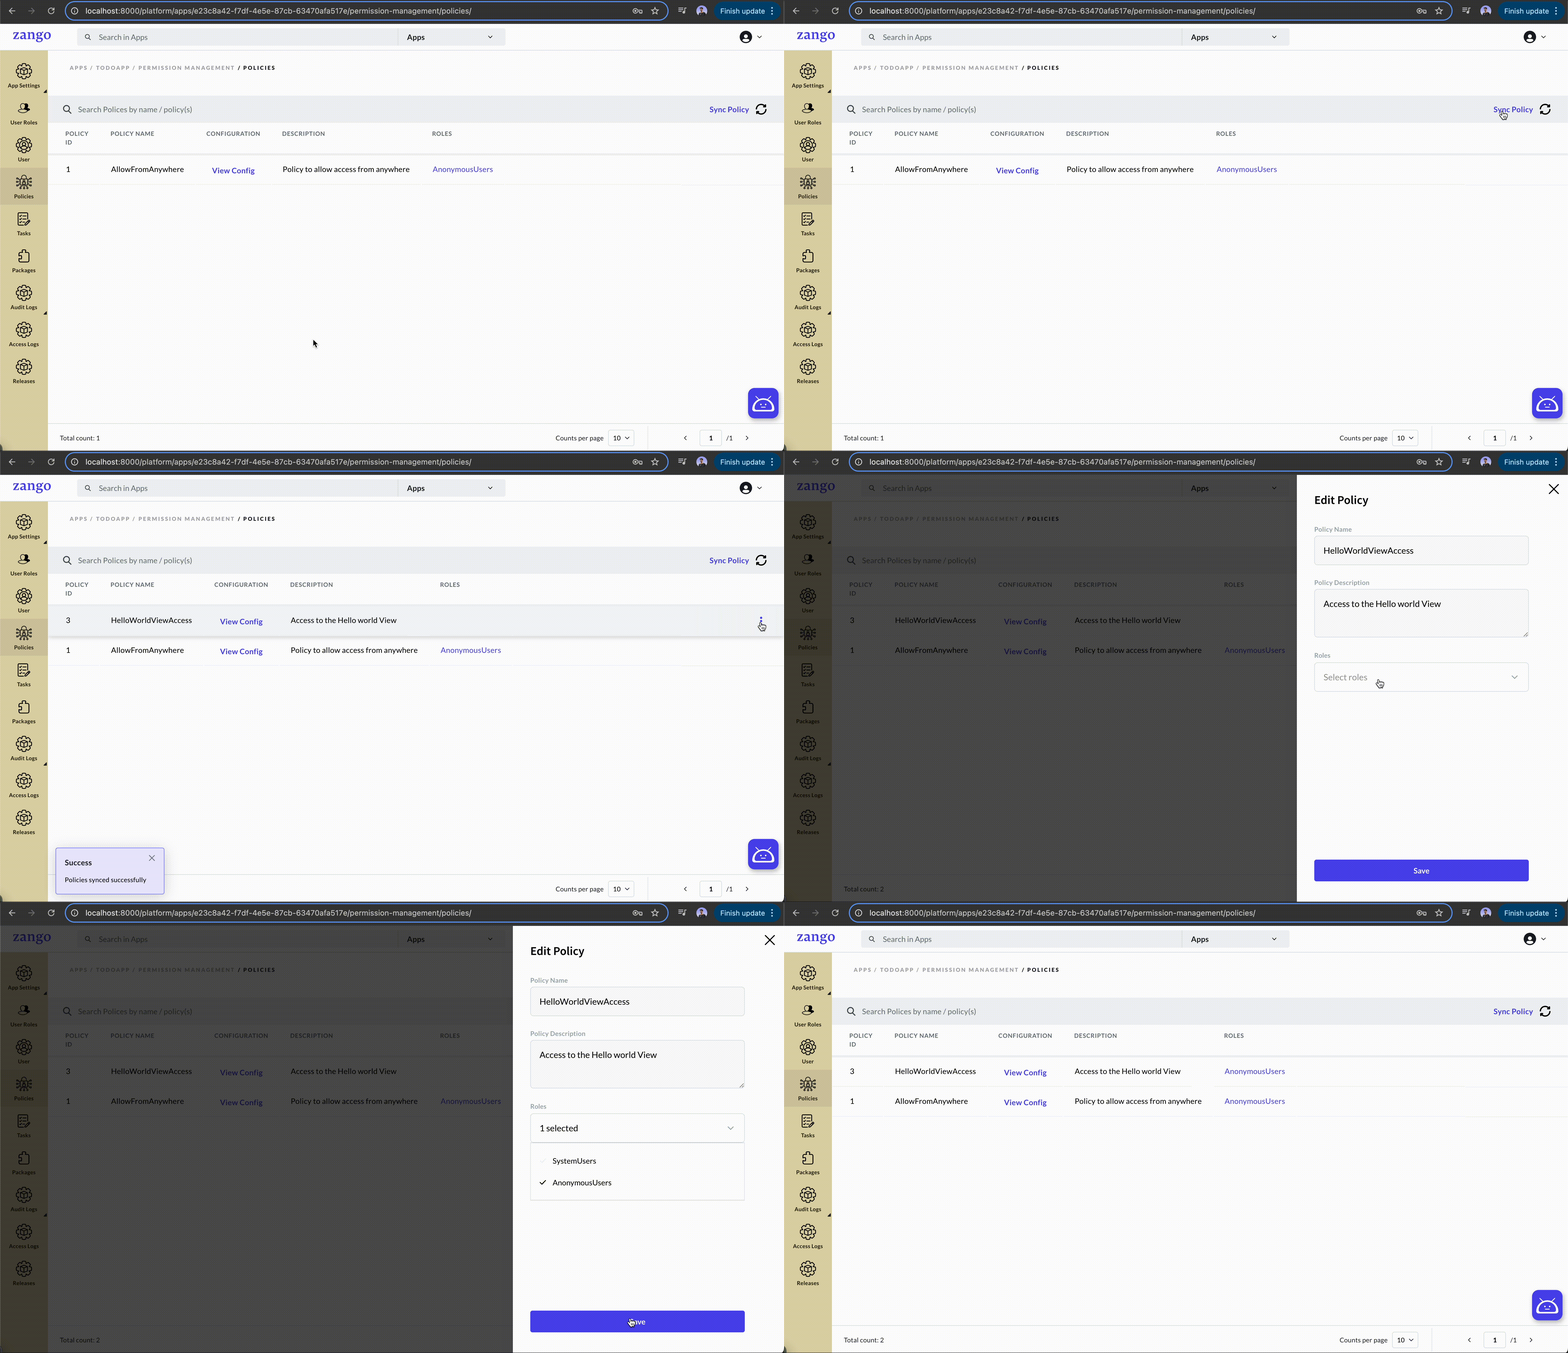
We need to setup policies to allow the HelloWorldView to be accessible by everyone. Lets create a policies.json file
inside our hello module.
MyFirstProject/workspaces/hello_world/hello/policies.json
{
    "policies": [
          {
                "name": "HelloWorldViewAccess",
                "description": "Access to the Hello world View",
                "statement": {
                   "permissions": [
                      {
                            "name": "hello.views.HelloWorldView",
                            "type": "view"
                      }
                   ]
                }
          }
    ]
}
Now go to app panel, sync policies and assign AnonymousUsers role to it. This role will make HelloWorldViewAccess accessible to eveyone from anywhere.

Registering the hello module
Lets move to our settings.json file and register our hello module. After registering, your settings.json file will look something like:
MyFirstProject/workspaces/hello_world/settings.json
{
    "version": "1.0.0",
    "modules": [
        {
            "name": "hello",
            "path": "hello"
        }
    ],
    "app_routes": [
        {
            "re_path": "^hello/",
            "module": "hello",
            "url": "urls"
        }
    ],
    "package_routes": [],
    "app_name": "todoapp",
    "zango_version": ">=0.3.0"
}
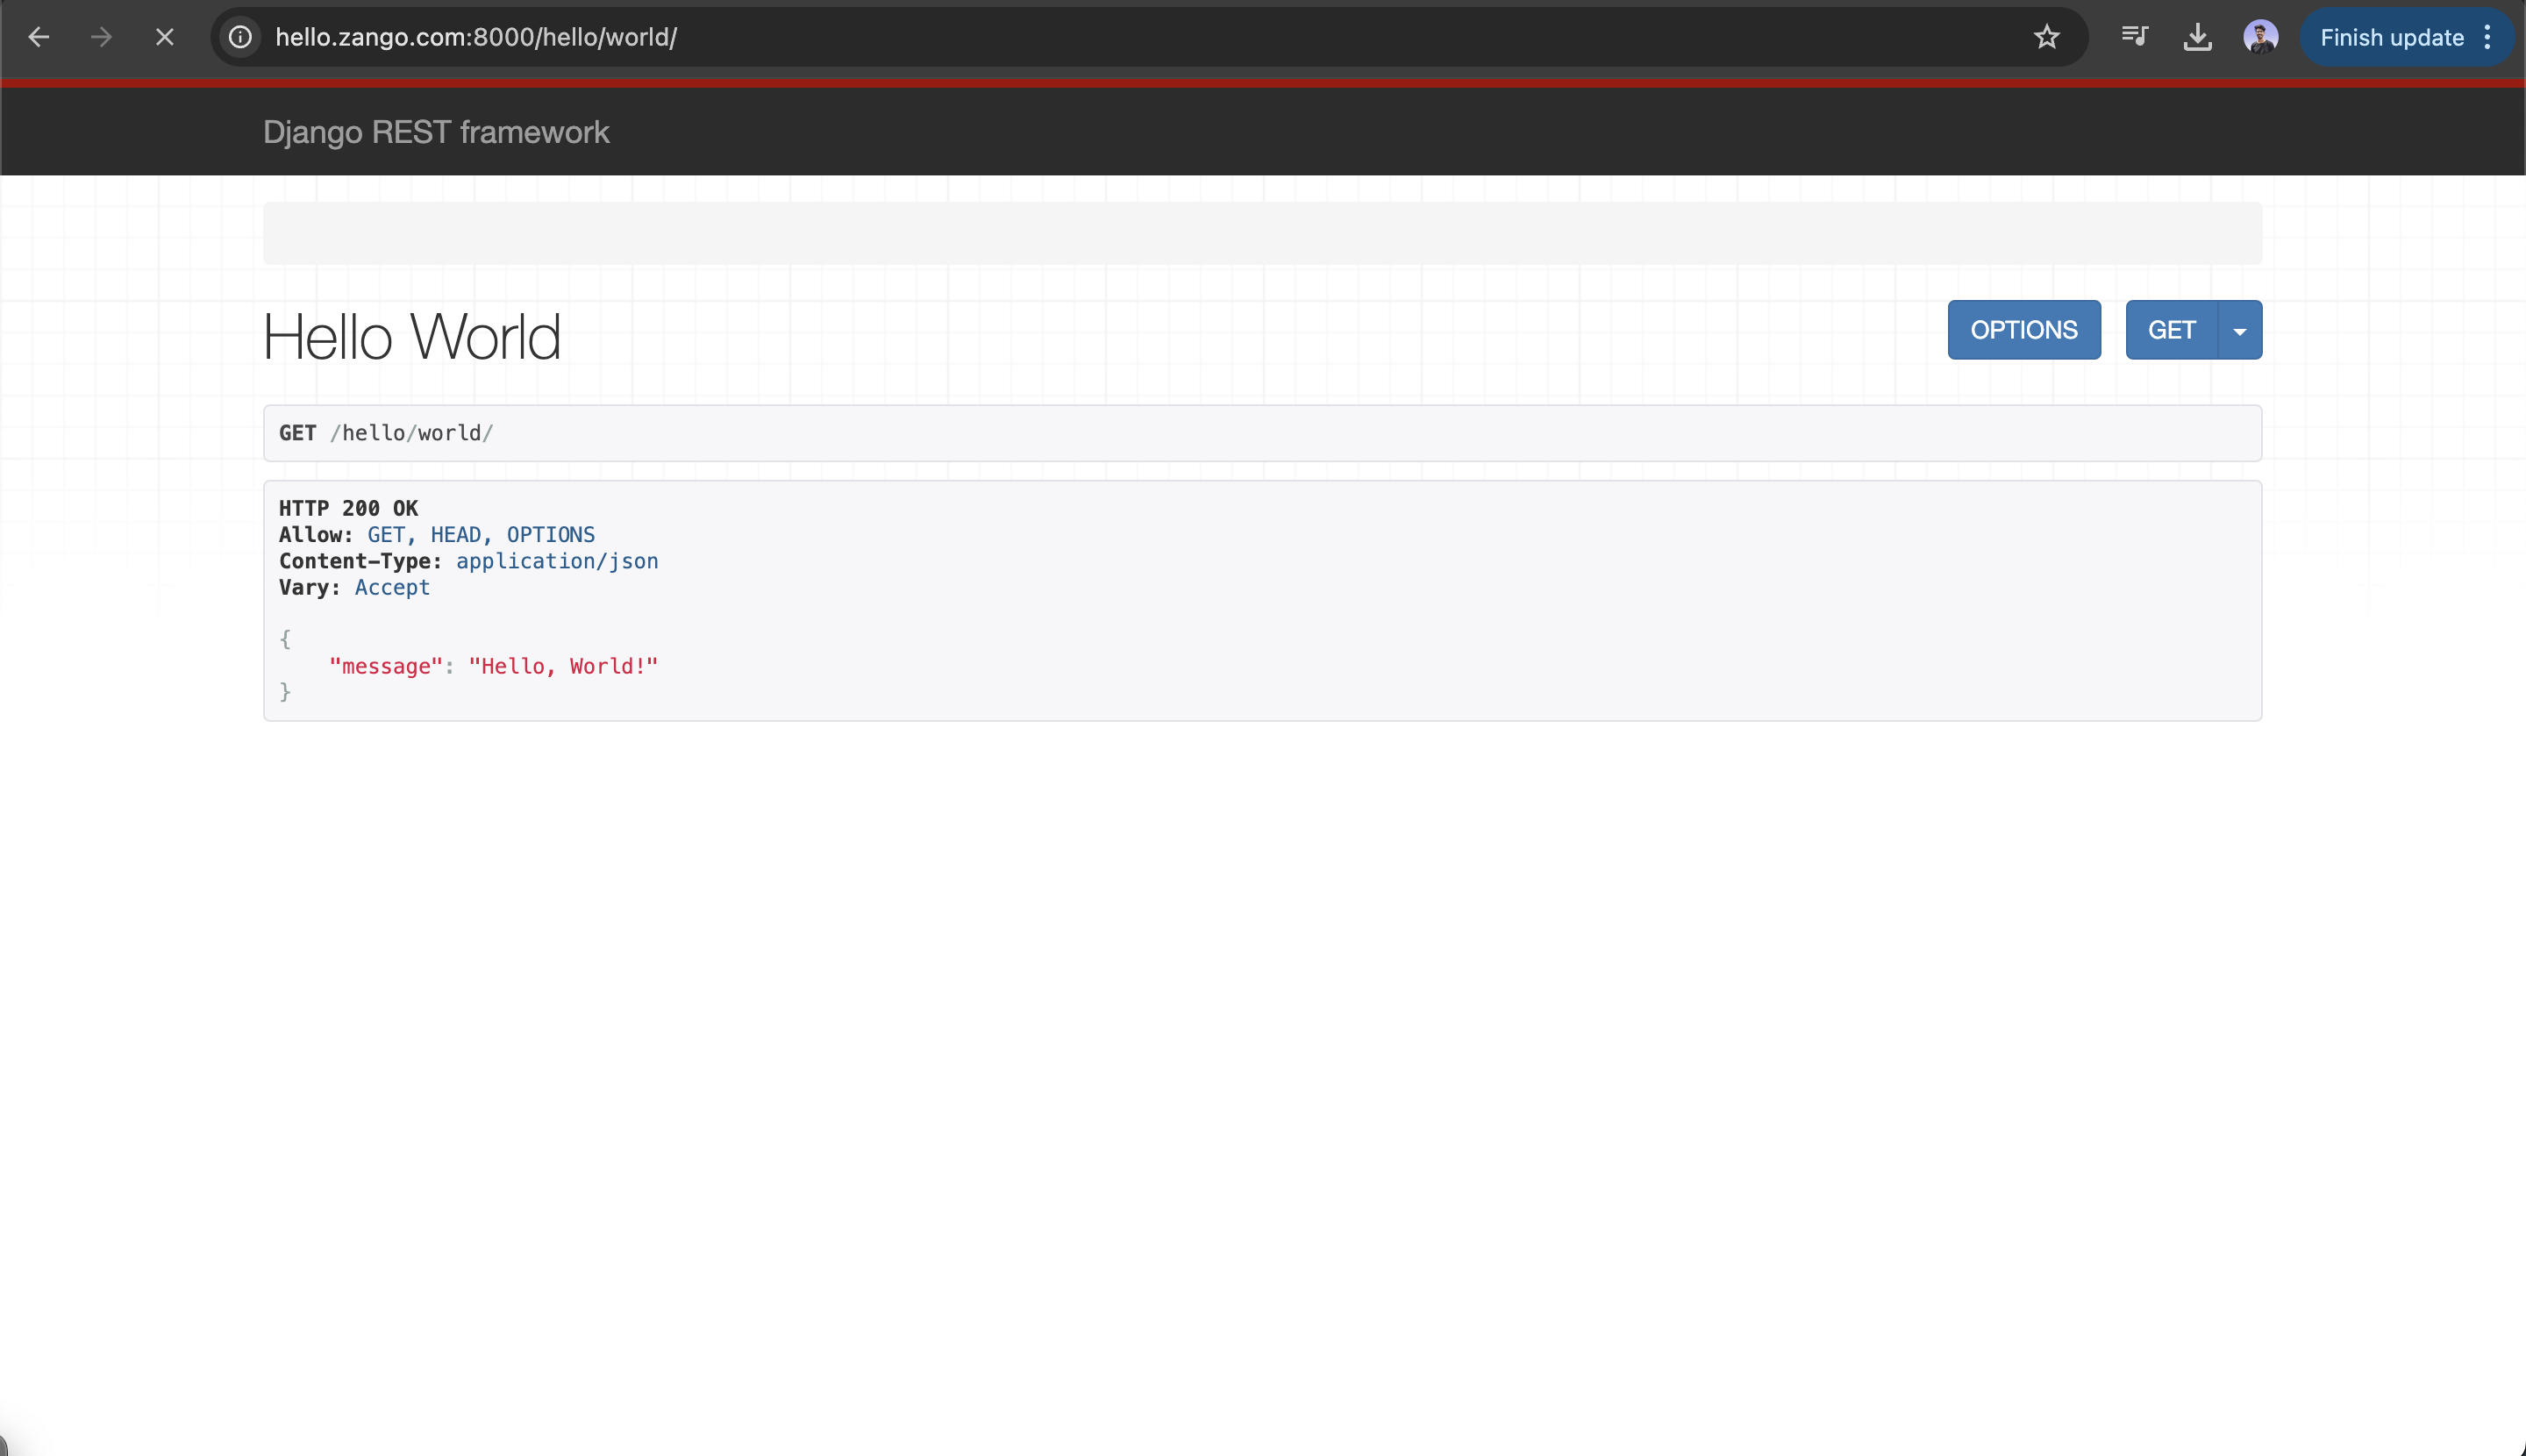
Let try our hello world app!
We have completed all the steps required to create a basic hello world app, Now go to the domain you configured for your app and you'll notice a page similar to the one shown below. This proves that our hello world app is working perfectly!
