Assigning Policies to User Roles
Assigning policies to user roles in the Zango platform allows you to precisely define the permissions and access levels associated with each role. Here's how you can assign policies to a user role:
Access the User Role Menu in App Panel: Start by navigating to the "User Role" menu within the App Panel interface. This is where you'll manage user roles and their associated policies.
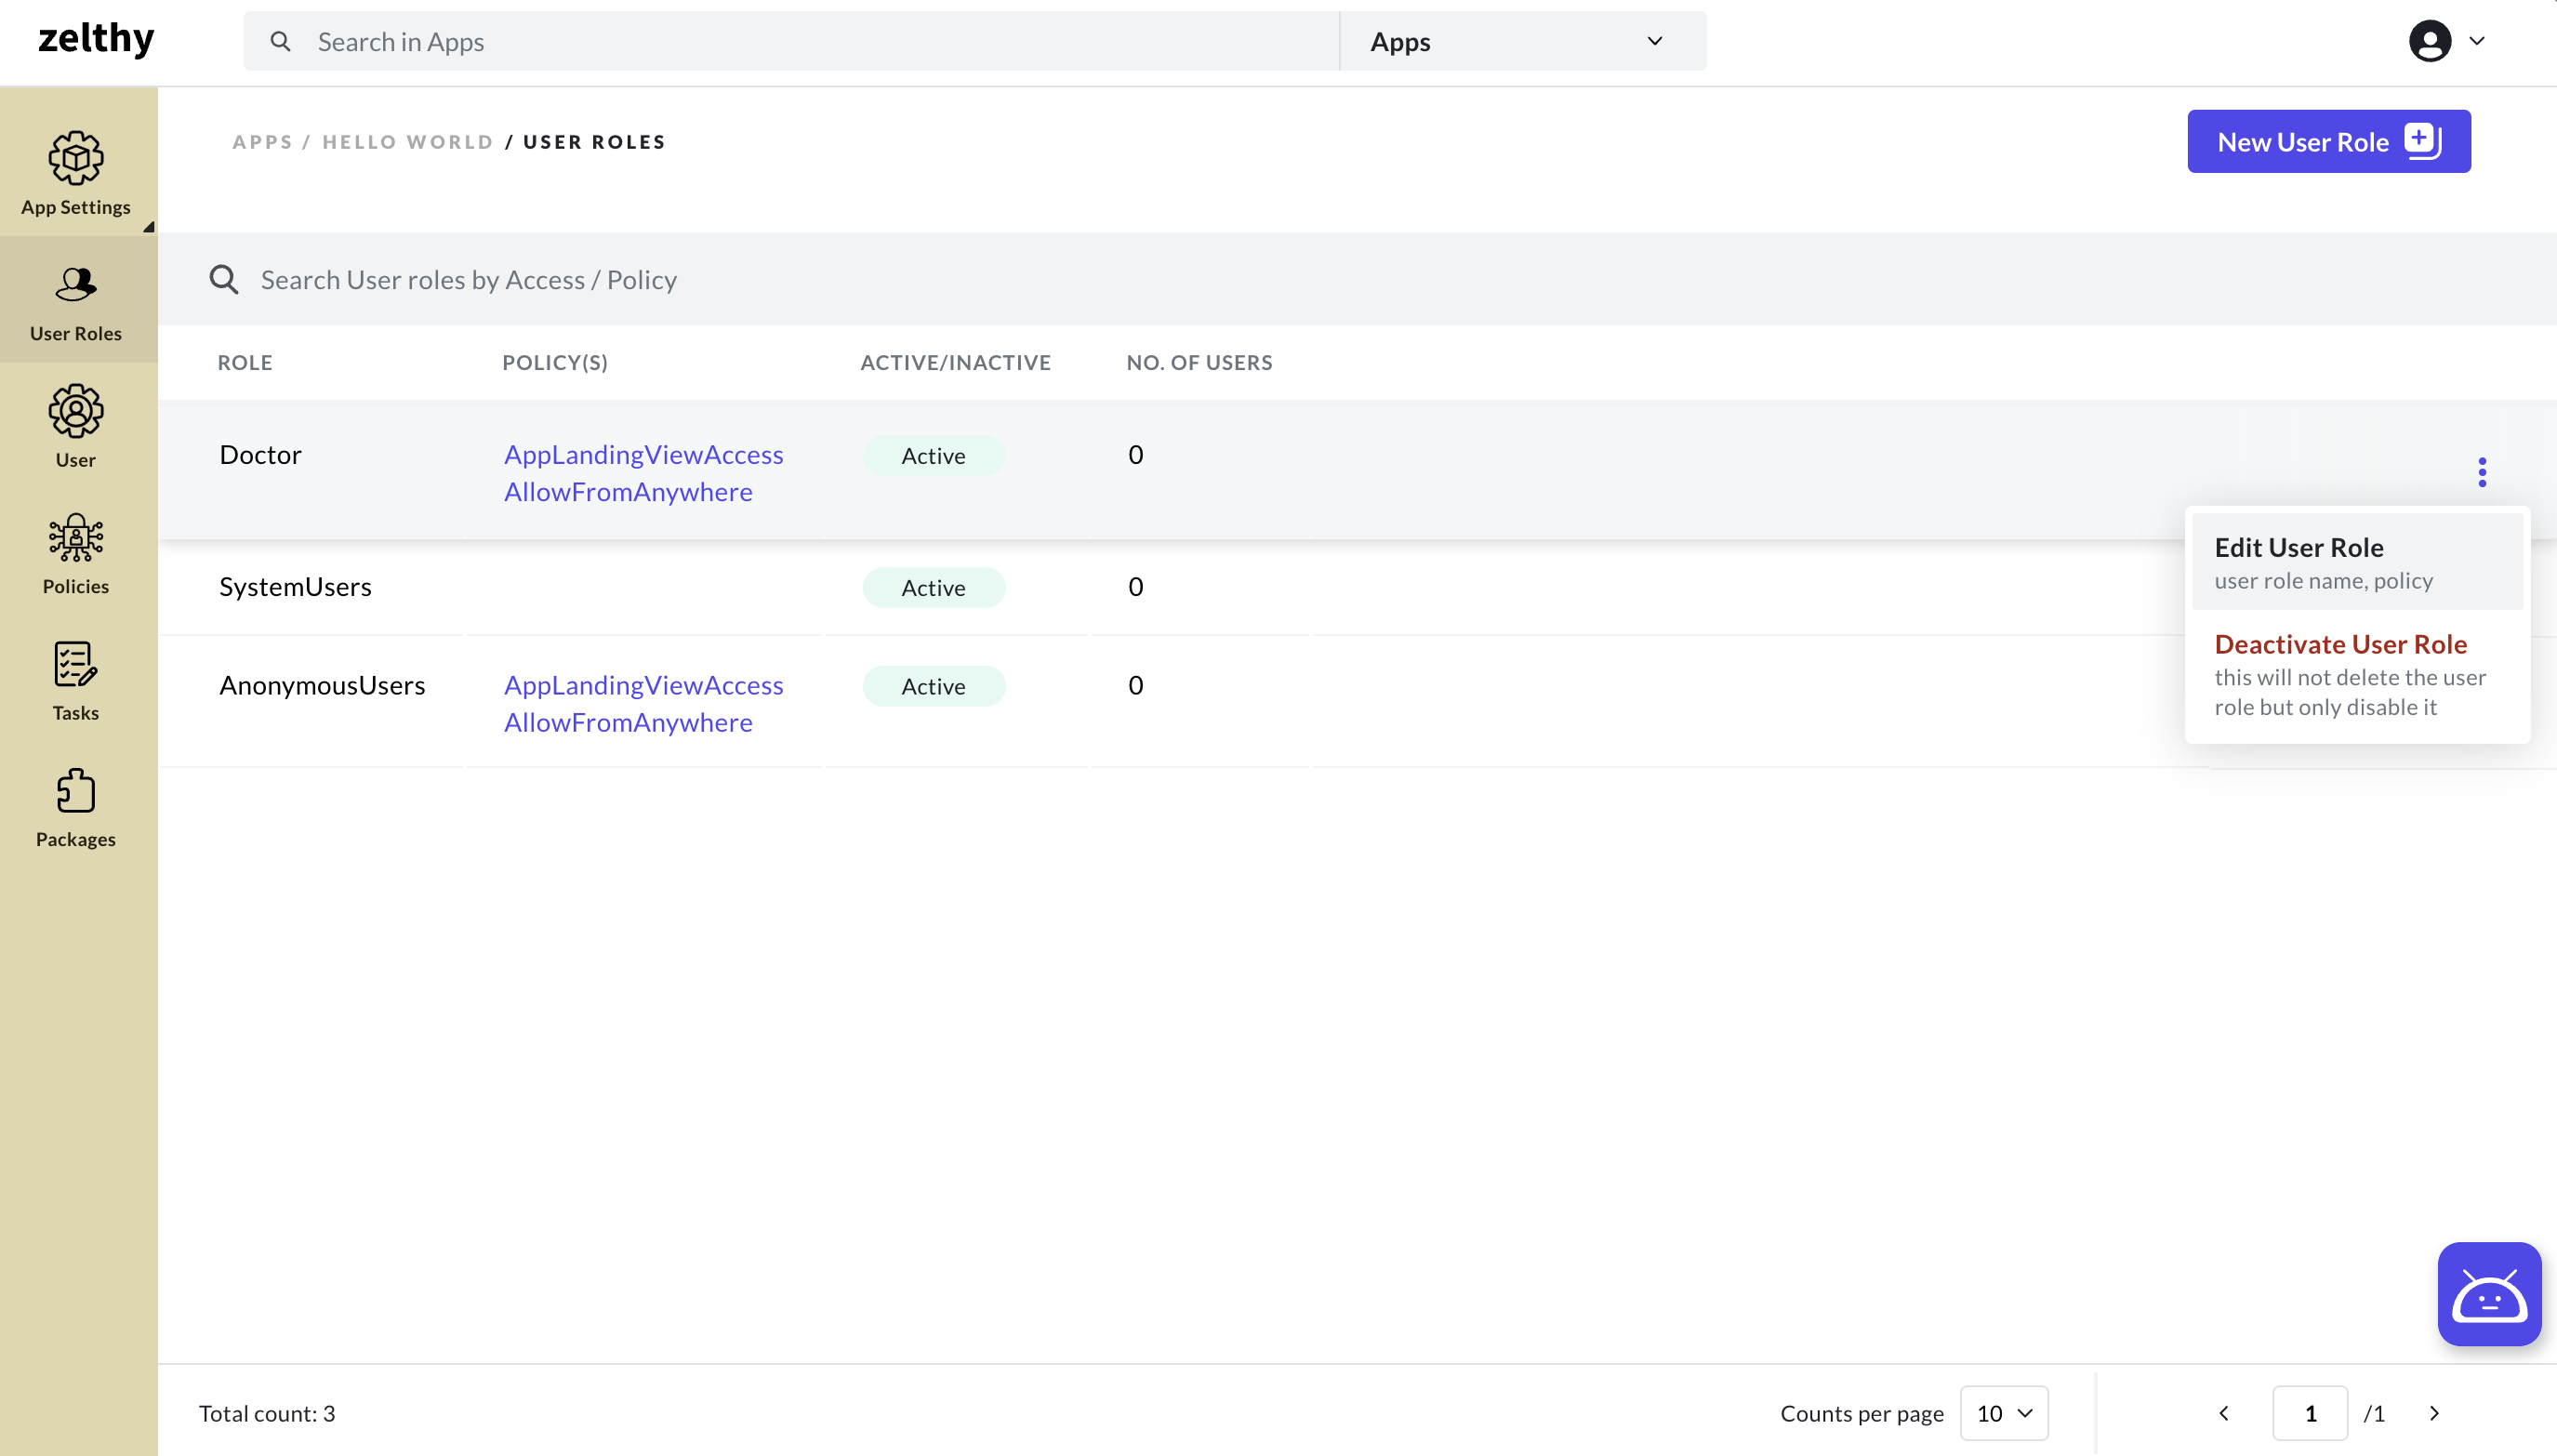
Locate the User Role: Find the specific user role to which you want to assign policies. Scan the User Roles table to identify the target role.
Edit the User Role: In the User Roles table, locate the three-dot menu corresponding to the target user role. Click on "Edit" from the menu. This action will open a form that allows you to modify the user role's settings.
Assign Policies: Inside the editing form, you'll find a "Policy" field specifically designed for assigning policies to the user role. This field will typically be a multi-select dropdown.
Select Required Policies: From the multi-select dropdown within the Policy field, choose the policies that you want to associate with the user role. These policies will determine the permissions and access rights granted to users with this role.
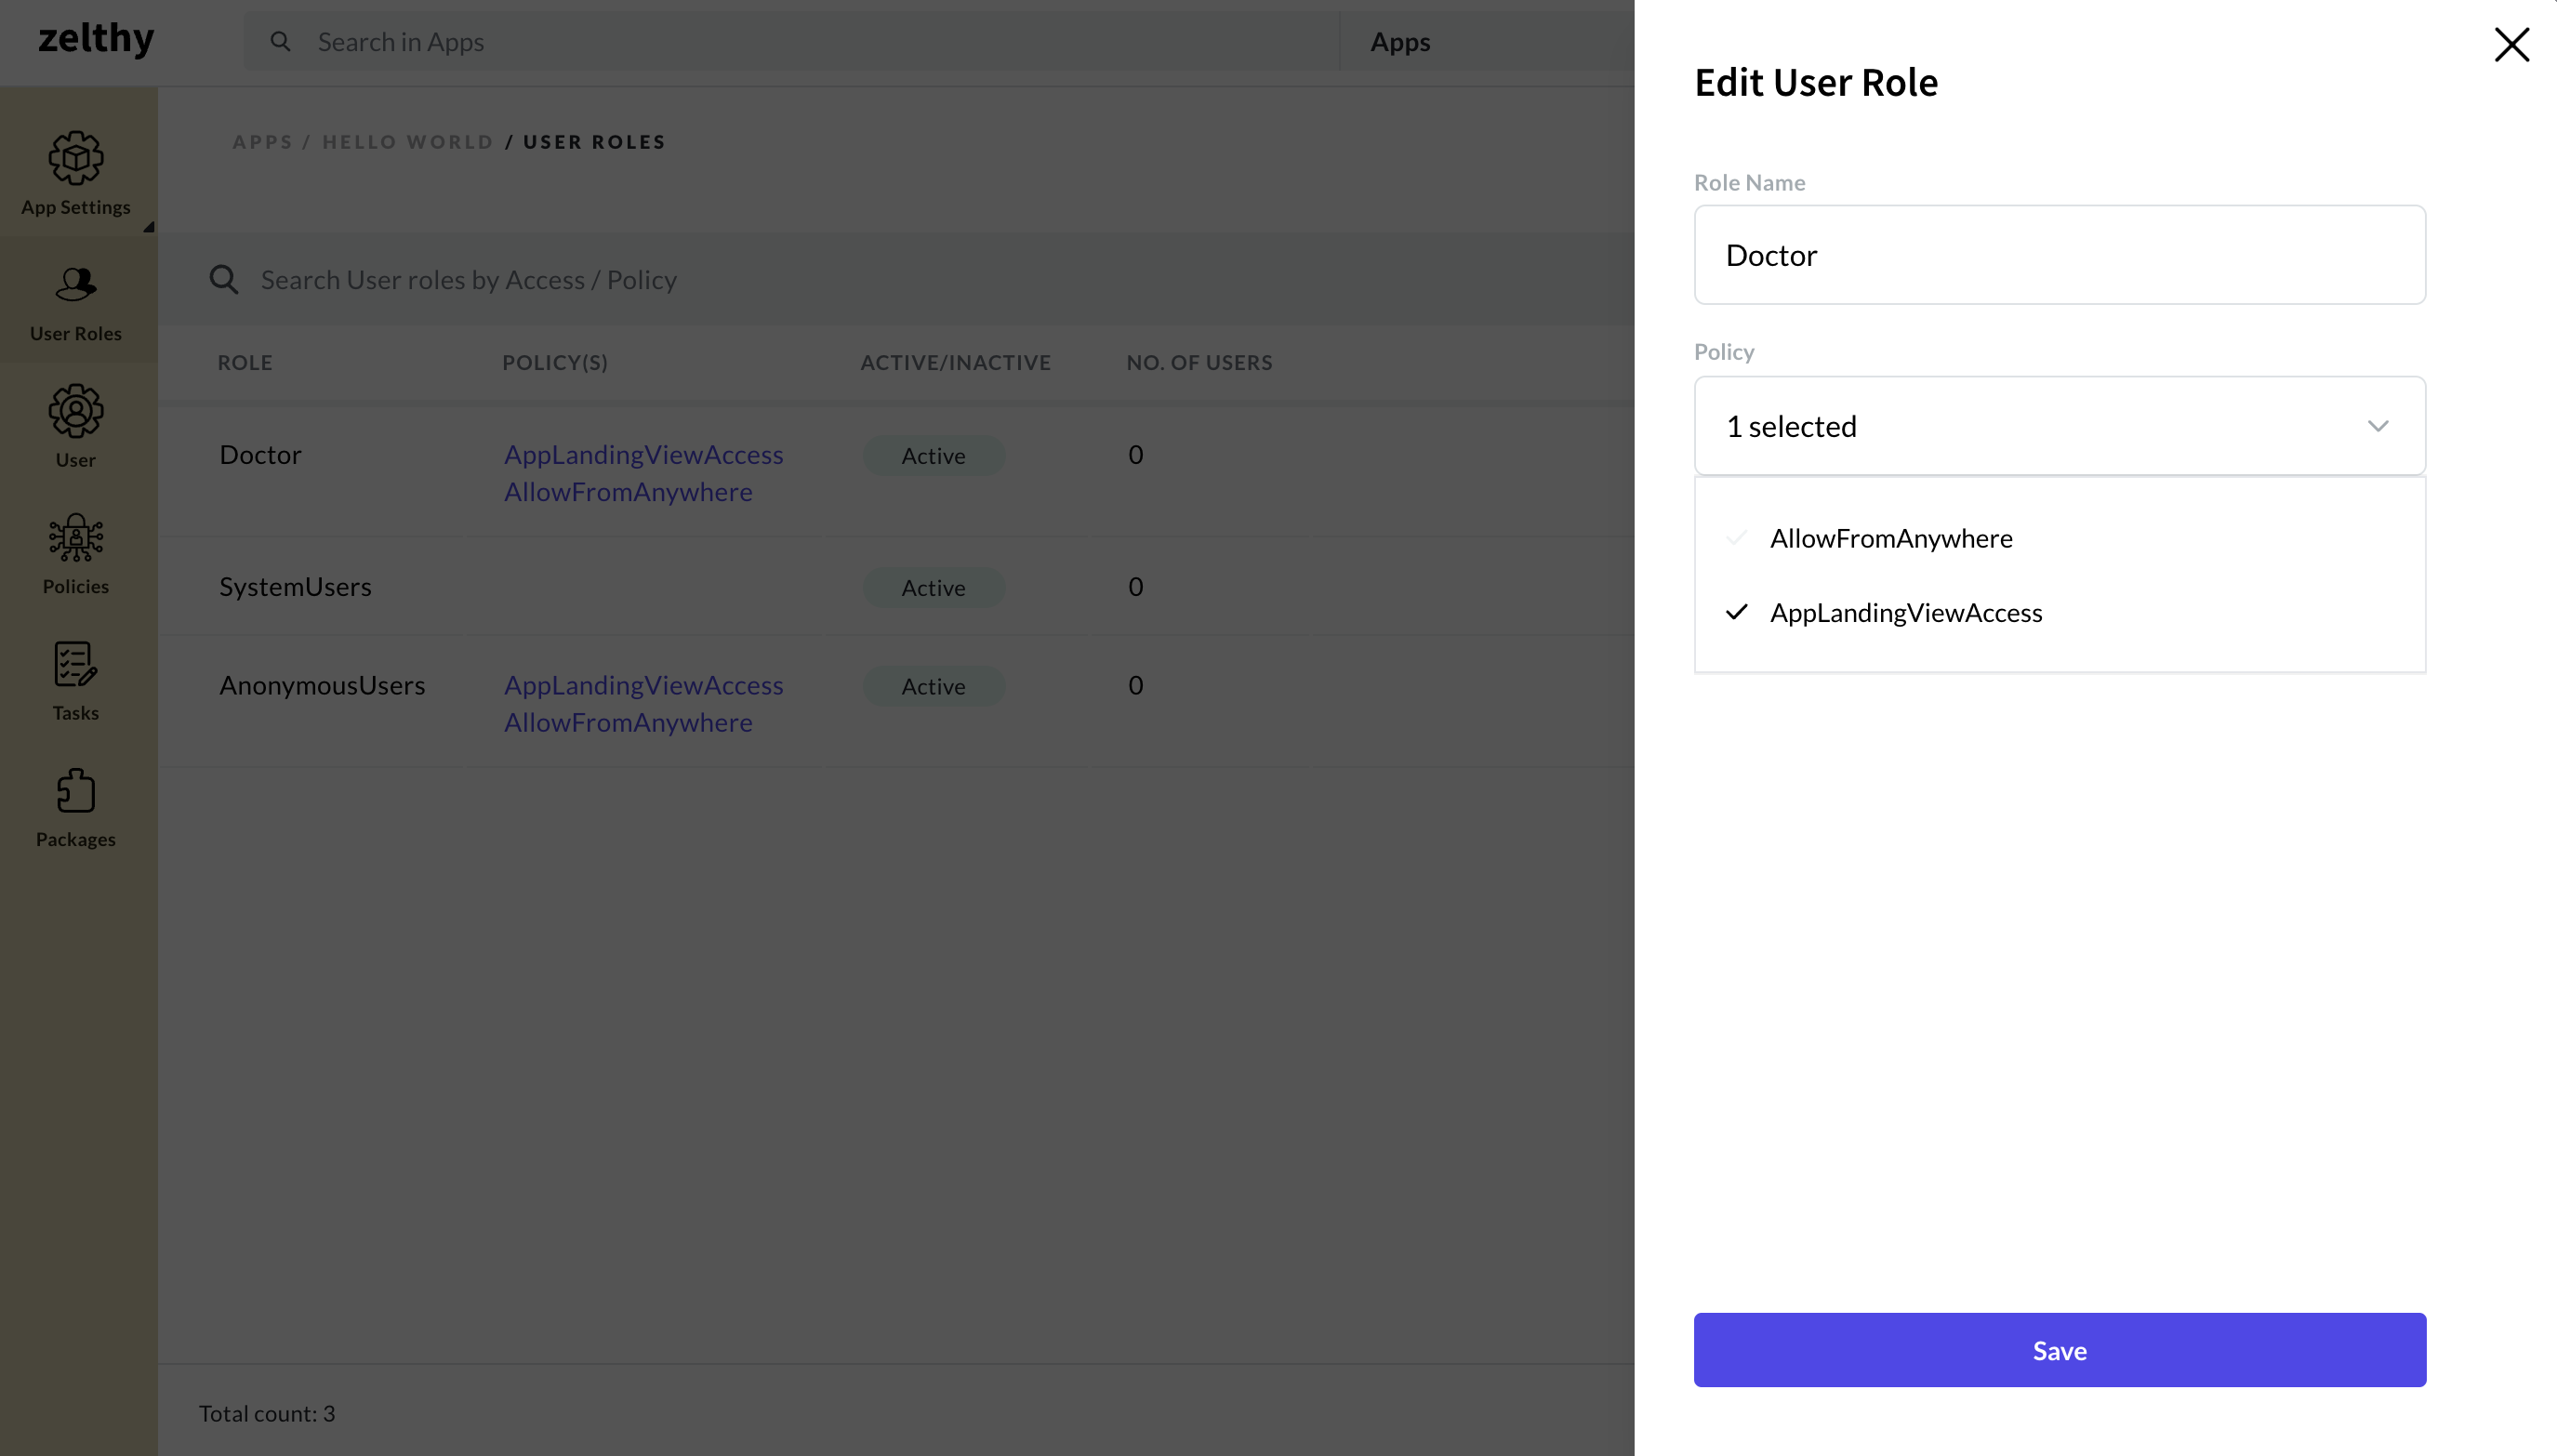
Update and Save Changes: Once you've selected the appropriate policies, click the "Update" button to apply and save the changes you've made to the user role's policies.
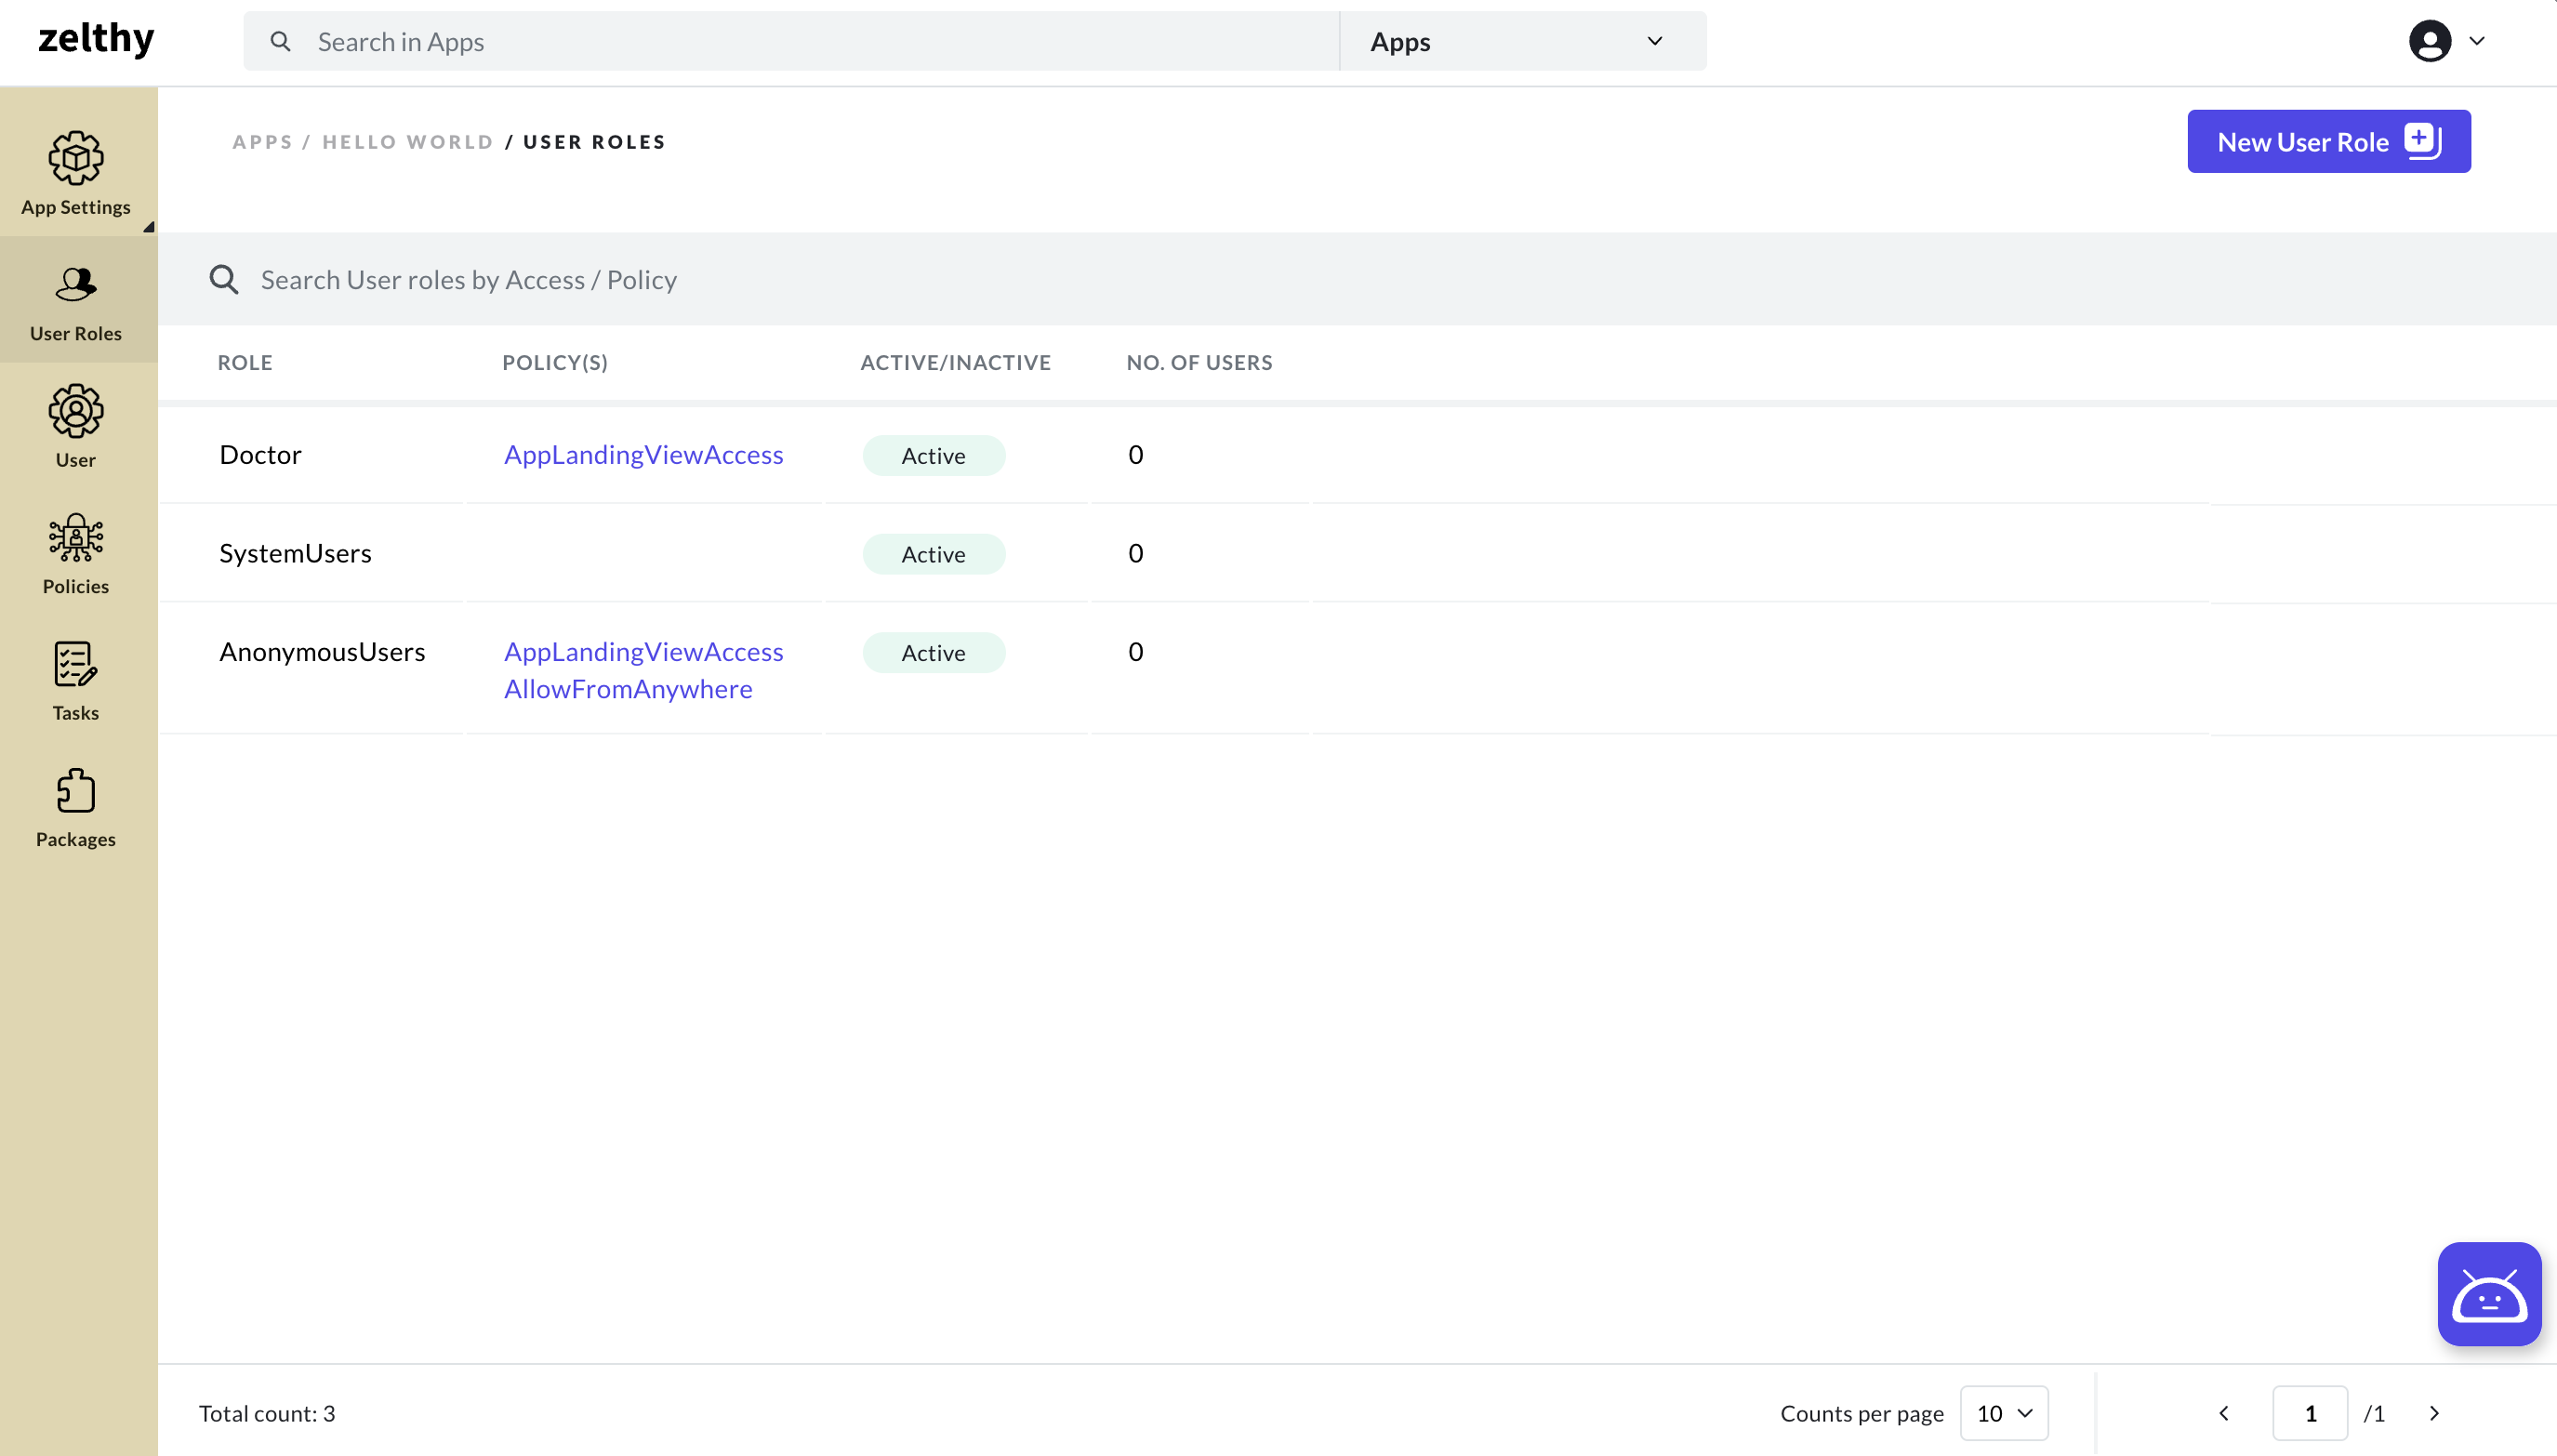
Upon completing these steps, the user role will be linked to the selected policies, defining the permissions granted to users holding this role. In the User Roles table, you'll be able to see the attached policies in the policies column for easy reference. This ensures transparency and visibility into the access rights of each user role, contributing to an organized and controlled environment within your business enterprise apps.